Any talk about web automation and Selenium ends up finding its way into the midst. Undoubtedly, Selenium is the most loved tool for both developers and testers across the globe when it comes to automating tests on web browser interactions.
But then, the point to ponder on is why Selenium turns out to be the users’ first choice when there are many other automation testing tools available in the market.
Let us delve deep into this.
What is Selenium?
Selenium is an Open-Source Automation Testing Tool, that supports different web browsers on different operating systems in a variety of programming languages and frameworks.
Listing out the other advantages of Selenium as well:
- It provides re-usability and integration with other third-party tools such as TestNG, JUnit; and CI/CD tools like Jenkins, Maven, Docker, etc.
- It requires very minimal hardware usage when compared to other tools such as UFT, Silk Test, etc.
- It’s very easy to learn and use. A lot of documentation is available on the Selenium website which is very helpful in writing automation test scripts.
- It provides constant updates as it has its community.
As mentioned above, Selenium support various programming languages.
Here, we go with Selenium WebDriver using Python.
Why Python with Selenium WebDriver?
Selenium WebDriver and Python combination facilitates a wide range of testing
- Easily automate Web/UI/Mobile apps.
- Test web services/REST API testing.
- Easily movable to Behavior Driven Development [BDD]/Test Driven Development [TDD] Testing approach and many more features.
- Runs faster when compared to other programming languages.
- Python is a high-level language that has prominent use in industry these days to develop tools, software and APIs,

How to Install Python in Windows?
Step1: Download the Python 3 installer
Using a browser in a Windows machine, navigate to this URL: https://realPython.com/installing-Python/.
Scroll down to the bottom of the page, select the version that suits your system processor. In this case, it is a 64-bit processor, so we will choose Windows x86-64 executable installer.
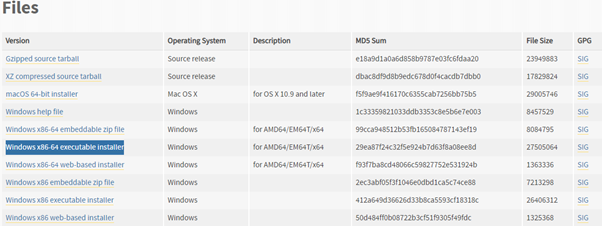
Step 2: Run the installer
Run the installer by clicking the downloaded file and click the “Install Now” button. A few minutes later you should have Python 3 installed and working on your system.
In case Python is installed with default path, the path to the Python executable wouldn’t be added to the Windows Path variable. Path variable lists the directories that will be searched for executables when you type a command in the command prompt. By adding the path to the Python executable, you will be able to access Python.exe by typing the Python keyword (you won’t need to specify the full path to the program).
Step 3: Add Python to the Windows Path
Go to Environment Variables on System Variables section, double click on Path. Click on ”New” to add the path of Python installer.
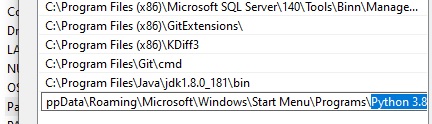
After setting up the path, Python can now be run from any folder by typing “Python” in command prompt.

Now that we have completed the installation of Python, let us configure Selenium WebDriver as well.
Installing Selenium WebDriver
Before installing Selenium WebDriver, we need some IDE to open projects. Here we use PyCharm IDE, as it is arguably the best IDE tool for Python developed by JetBrains.
It can be downloaded from https://www.jetbrains.com/pycharm/. Click on “Download Now” and download the Community Edition.
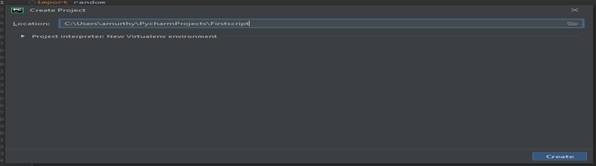
After PyCharm is installed, open the Editor and ‘Create New Project’.
Add Filename ‘firstScript.py’.
As we need to Write Test, we need to import built-in unit test library by typing:
import unittest
Next, we need to import Selenium WebDriver libraries, for that type:
from Selenium import webdriver
Launching Browser
Next, we need to launch the browser. As specified before, Selenium supports multiple browsers.
We shall see how to launch Firefox and Chrome browsers in this example. We shall see other supported browsers in the further articles.
Firefox Browser
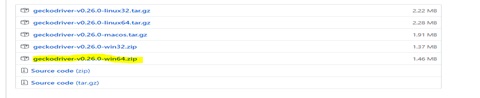
Firefox versions 47 and above need GeckoDriver (created by Mozilla) to use WebDriver in Selenium 3.14.
Download GeckoDriver from https://github.com/mozilla/geckodriver/releases.
After downloading GeckoDriver, we must set ‘marionette’ to false through “Desired Capabilities” to set communication in Firefox 48 and above.
The legacy driver provided and maintained by the Selenium project doesn’t work for Firefox 48 and above.
The WebDriver browser extension introduces several valid security concerns for the Firefox browser, and hence, Selenium was no longer supported in Firefox. But then, the Marionette-based solution being developed and maintained by Mozilla, came as a solution for Selenium.
After ‘marionette’ is set to false through Desired Capabilities, import desired capabilities from WebDriver.
from Selenium. webdriver.common.desired_capabilities import DesiredCapabilities
cap = DesiredCapabilities().FIREFOX
cap["marionette"] = False
Import GeckoDriver server.
driver = webdriver.Firefox(capabilities=cap, executable_path="C:\Users\amurthy\PycharmProjects
\firstSeleniumTest\venv\Driver\geckodriver.exe")
We navigate to the user-specified URL using the inbuilt “get” method provided by Selenium WebDriver. The below statement helps to achieve the same.
self.driver.get("https://www.google.com/")
To sum it up, the below script would help launch Google.
import unittest
from Selenium
import webdriver
from Selenium.webdriver.common.desired_capabilities
import DesiredCapabilities
import time
cap = DesiredCapabilities().FIREFOX
cap["marionette"] = False
driver=webdriver.Firefox(capabilities=cap,
executable_path="C:\\Users\\amurthy\\PycharmProjects\\firstSeleniumTest
\\venv\\Driver\\geckodriver.exe")
driver.set_page_load_timeout(10)
driver.get("https://google.com")
driver.find_element_by_name("q").send_keys("Automation step by step")
time.sleep(2)
driver.close()
driver.quit()
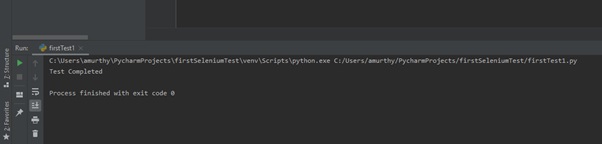
print("Test Completed")
Click on “Run” in the menu. This will open a Firefox browser window and launch the Google page on it.
Alternatively, you can run the script by pressing Ctrl+Shift+F10.
Chrome browser:
Launching Chrome browser is very simple. Just execute with the ChromeDriver by specifying the path as mentioned below.
import unittest
from Selenium
import webdriver
from Selenium.webdriver.common.desired_capabilities
import DesiredCapabilities
driver = webdriver.Chrome("C:\\Users\\amurthy\\PycharmProjects\\firstSeleniumTest
\\venv\\Driver\\chromedriver.exe")
driver.set_page_load_timeout(10)
driver.get("https://google.com")
driver.find_element_by_name("q").send_keys("Automation step by step")
driver.find_element_by_name("btnK").click()
time.sleep(2)
driver.close()
driver.quit()
print("Test Completed")
Conclusion
Selenium WebDriver is one of the most popular tools for Web UI Automation. There is nothing better than Python which can automate a broad range of web applications. This article was all about Installing and launching Firefox and Chrome Browsers with Selenium WebDriver using Python. Let us dig into advanced Selenium Topics like Navigation and Locators in the upcoming articles. Stay tuned!